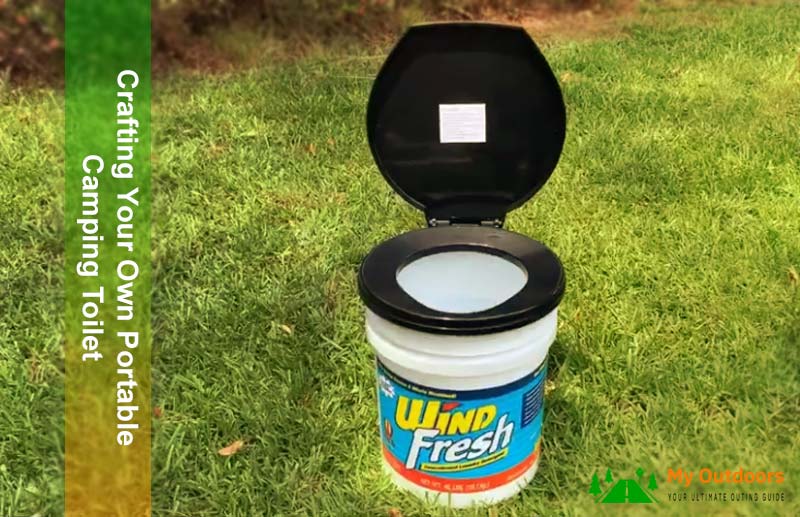
In past, I’ve thought about checking DIY on portable toilet. And that was what made me search on this topic quite a lot. Finally, I have a couple of methods to use and share.
You can learn how to make a portable toilet for camping in two easy methods. Both takes less effort and time. Using a trash bag, camping chair, and bucket, you can create a useful camp-style toilet. Or you can use a foam grip tube instead of the camping chair to make another version of temporary toilet.
To know the procedure of making these 2 styles of portable toilets, keep on reading. I’ll be sharing some tips on using these as well.

Table of Contents
DIY Guide To Building Your Own Portable Camping Toilet!
For those of you who want to make your own portable toilet during the camping session, it’s time to build one. I’ll be sharing the instruction on the easy way to make a camping toilet that’s portable:
Get All The Tools & Materials
It would be hard to start the procedure if you don’t have the right gears right beside you. Ensure to get them and confirm the quality beforehand. Here are all the things that you’ll need:
- 5 gallons of the bucket.
- Trash bag
- Sawdust or sand.
- Toilet seat.
- Toilet paper.
- Foam grip tube.
- Camping chair.
- Utility knife.
Pro Tip: Set all the tools and materials in an organized position.
After you’ve gathered all the tools that I’ve mentioned above, it’s time to make the portable toilet. Based on your preference, choose one method, and follow the direction:
Method 1: DIY Quick Portable Toilet Solution
- Bring the camping chair and cut it using a knife based on the shape of the bucket.
- Under the chair, place the 5 gallons (18.9 liters) bucket and place it on the floor which you mark as the toilet area.
- Use the trash bag or portable toilet bag and put it inside the bucket. Be sure it is hanging outside so that the trash bag doesn’t go inside.
- Pour the sawdust or sand inside the trash bag as this will help the human waste to absorb and control bad smells.
- Get a good-size toilet seat that fits on 5 gallons of the bucket like the Emergency Zone toilet seat.
- Place it on top of the bucket and be sure it isn’t moving.
- Done!
Method 2: Homemade Porta Potty Solution
- Place the bucket in the right spot.
- Use the trash bag and ensure it is covering all the interior areas. Do not let it go inside.
- Pour the sawdust or sand inside to avoid waste and urinate scent.
- Grab the foam grip tube and slice it from the top to bottom area so that this can go on the bucket.
- Use the foam grip tube and press it to set properly.
Place The Saw Dust And Toilet Paper
Once you are done making the portable camping toilet, you need to use toilet paper and hang it on the bucket’s handle. And then, pour the sawdust or sand into a trash bag (separately) and put it beside the decided area to use later. Instead of it, you can use cat litter.
Read: How to Dispose of Camping Toilet Waste
Tips On Using The Portable Toilet During Camping!
- Ensure to make a private toilet screen using a hula hoop, shower curtain, bungee cords, and other tools. Otherwise, it would be embarrassing to poop or pee in front of others.
- Always place backup toilet paper near the portable toilet area in case of emergency.
- Make sure to sit in the proper position by holding the toilet seat. Or else, it can cause you to fall.
- Each time you use the portable toilet in camp life, be sure to cover the bottom of the plastic bucket using 0.5-inch sawdust. This will help you to get rid of bad scents and see the human waste.
- Ensure the portable toilet that you’ve made is at least 100 – 300 feet (33.33 – 100 yards) from the campsite.
- Try to close the lid of the toilet seat each time you use it. Know that there’s no flushing option.
- Be sure to change the trash or garbage bag (which you and your campmates used) every 2 – 3 days. Based on the number of camp members, you might need to change it daily.
Wrapping Up
Making a portable toilet for camping days is often the only route if you have mistakenly forgot ordering one online. The above methods are easy and quick, so it won’t take more than 10 minutes to get the perfect DIY result.
Just be sure to gather all the tools and follow the instructions the right way. Hope this piece of writing helps you!
Philip Robert is an avid camper and hiker who loves nothing more than spending his weekends camping and hiking in the mountains. He has been camping and hiking since he was a young boy and has never lost his love for the outdoors.
Philip is a firm believer that there is no better way to connect with nature and get some exercise than by spending time in the great outdoors. He is always on the lookout for new trails to explore, and loves sharing his experience with others.
“MyOutdoors.net” is a place where you will find a comprehensive guide you need to know about camping and hiking. Philip has the knowledge and experience to help you enjoy the great outdoors.